










1x vs 3.5x: Choosing a Portrait Lens
Use the 1x main camera when the surroundings are part of the portrait or space is limited, and use 3.5x telephoto when you want a tighter composition from farther away. Choose the camera before positioning the subject so that distance, lighting and background work together.
Professional-looking smartphone portraits do not come from one lens or one feature alone. A reliable result comes from matching the field of view to the story, keeping a comfortable distance from your subject, finding useful light and checking the frame before you tap the shutter button.
Why camera choice changes a portrait
Field of view and background coverage
A 1x camera shows more of the scene, which makes it useful when the location adds information about the person. A 3.5x telephoto shows a narrower slice of the background, making it easier to create a clean, subject-focused composition without physically moving objects out of the way.
Camera-to-subject distance
Lens choice changes where the photographer needs to stand. With 1x, you can work closer and still include the subject's surroundings. With 3.5x, you normally step farther back to keep the same amount of the person in frame. Choose the lens first, then move until the composition feels intentional.
Facial perspective and framing
Perspective is strongly influenced by shooting distance. When a wide view is used very close to a face, nearer features can appear more prominent. Standing farther away with telephoto framing can produce a tighter portrait with more balanced-looking proportions. This is a framing effect, not a guarantee that every telephoto image will look better.
Available light and physical space
The best lens is the one that suits both the location and the available light. In a small room, 3.5x may force you against a wall or crop too tightly, so 1x is often more practical. Outdoors or in a large hall, the extra working distance of 3.5x may be easier to use. In low light, hold the phone steadily and check the preview for motion blur before taking additional shots.
When should you use the 1x main camera?
Environmental portraits
Use 1x when the setting helps explain who the person is or what they are doing, such as a chef in a kitchen, a student on a campus or an artist in a studio. Keep the person visually dominant while leaving enough context to make the location meaningful.
Groups and confined spaces
For family gatherings, groups of friends or colleagues in a room, 1x usually gives you more flexibility. Step back as far as the space allows, keep faces away from the extreme edges of the frame and take more than one image in case someone blinks.
Full-length photographs
A 1x view makes full-length portraits easier when you cannot move far from the subject. Hold the phone level, avoid tilting it sharply up or down, and leave a little space around the feet and head so the frame does not feel cramped.
Portraits that include architecture or scenery
Choose 1x for portraits at monuments, cafés, campuses, hill stations, tourist destinations or wedding venues when the background is part of the memory. Check vertical lines and the horizon, then position the person so important details remain visible rather than appearing to grow out of the head or shoulders.
When should you use 3.5x telephoto?
Head-and-shoulders portraits
A 3.5x telephoto is well suited to head-and-shoulders compositions because it fills the frame from farther away. Ask the subject to turn slightly towards the light, leave modest breathing room above the head and avoid cropping exactly through joints or the chin.
Waist-up portraits
For a waist-up portrait, step back until the upper body fits comfortably and the hands are either fully included or intentionally outside the frame. Telephoto framing can reduce how much distracting background appears, but you should still check the edges.
Candid portraits from a respectful distance
3.5x can help you photograph natural expressions without standing too close. Always obtain appropriate consent and respect requests not to be photographed. At events, keep pathways clear and avoid intruding on private moments simply because the lens can reach farther.
Simplifying a distracting background
When signs, vehicles or crowds make a scene messy, a narrower field of view can exclude more distractions. Reposition slightly left or right, look for a simple patch of colour or light behind the subject, and remember that software-generated blur is not identical to optical background blur.
How far should you stand from the subject?
Select the lens before changing position
Start by deciding whether the portrait needs context or isolation. Set 1x for context and 3.5x for a tighter view, then move until the framing works. There is no universal distance because subject size, space and composition vary.
Move physically rather than relying on digital zoom
If space and safety allow, use your feet to refine the crop after choosing the optical camera. Avoid pinching far beyond the available optical view when image quality matters, because additional digital enlargement may reduce retained detail.
Check the background after repositioning
Every step changes more than subject size. It also changes the overlap between the person and the background. Pause after moving, inspect all four corners, remove bright distractions where possible and ensure the subject remains separated from similarly coloured objects.
Maintain a comfortable distance during candid photography
The subject should not feel crowded or watched. Explain what you are doing, agree on the type of images being captured and stop when asked. A technically strong portrait is not worthwhile if the process makes someone uncomfortable.
A repeatable portrait setup
Find soft, directional light
Place the subject near a window, shaded doorway or open outdoor area where light comes from one side without creating severe highlights. Turn the subject's face gradually until both eyes are clearly visible and the catchlight looks natural. Avoid forcing the person to stare directly into harsh sunlight.
Position the subject away from the background
Create physical separation between the person and the wall, foliage or décor behind them. This helps simplify the frame and can make subject separation look more convincing, whether you use natural depth or a portrait mode.
Focus on the nearest eye
Tap the nearest eye or the subject's face in the preview and wait for focus to lock. If the person is moving, take a short sequence rather than trusting a single frame. For groups, align faces at a similar distance from the camera where practical.
Check exposure, skin tone and subject edges
Review the preview for clipped highlights, blocked shadows and unnatural colour shifts. In portrait modes, inspect hair, glasses, jewellery and shoulders because software separation can sometimes misread fine edges. Reduce the simulated blur if the transition looks artificial.
Capture both 1x and 3.5x versions
When time and space permit, make one contextual 1x portrait and one tighter 3.5x portrait. The pair gives you more options for photo albums, social media posts and different crops, and it makes lens selection easier to learn through direct comparison.
Using Reno16 portrait features
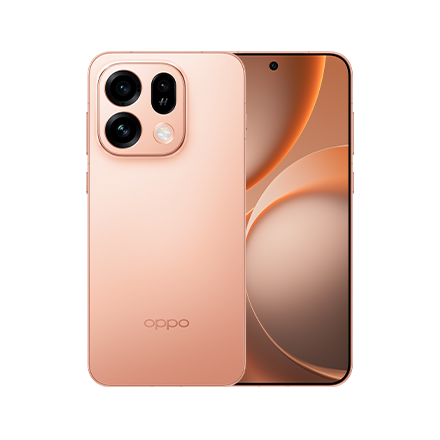
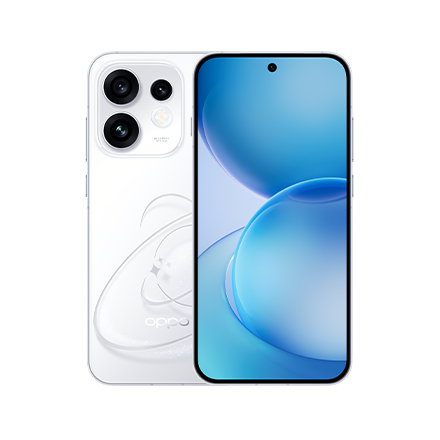
The OPPO Reno16 5G starts at ₹66,999 for the 8GB + 256GB configuration, placing its entry variant in the under ₹70,000 range. Other storage variants are priced separately. It combines its portrait tools with a 50MP telephoto camera with OIS and 3.5x optical zoom.
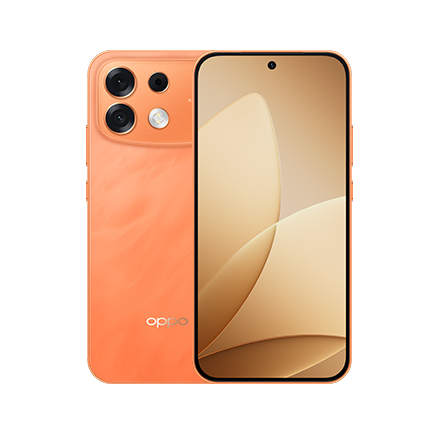
The OPPO Reno16c 5G starts at ₹49,999 for the 8GB + 128GB configuration, placing its entry variant in the under ₹50,000 range. Other storage variants are priced separately. It also includes a 50MP telephoto camera with OIS and 3.5x optical zoom.
3.5x Telephoto Vibe Portrait
On the OPPO Reno16 5G, 50MP 3.5x Telephoto Vibe Portrait uses an 80mm description, OIS and 3.5x optical zoom. The OPPO Reno16c 5G has a separate 50MP 3.5x Telephoto specification with a 92mm description and OIS. Keep these focal-length descriptions distinct when comparing framing: equal zoom labels do not mean the two camera modules should be described as identical.
Natural Tone Imaging
Natural Tone Imaging is the approved named feature for the series' skin-tone rendering. Use it as part of the overall portrait workflow, then review the image for exposure and colour rather than assuming processing alone will correct unsuitable light or composition.
Reviewing the result before applying additional edits
Zoom into the captured image and check the eyes, fine hair, skin texture, bright clothing and background edges. Make light edits only after choosing the strongest frame. Avoid excessive smoothing or blur that changes the person's appearance or creates obvious cut-out edges.
Accounting for the models' different telephoto focal lengths
The 80mm description on OPPO Reno16 5G and the 92mm description on OPPO Reno16c 5G can produce different framing from the same position. When switching models, do not copy a fixed standing distance. Choose 3.5x, look at the live frame and move until the portrait has the intended headroom and background coverage.
Conclusion
For professional-looking smartphone portraits, choose 1x when the person and place belong together, and choose 3.5x when you need a tighter composition from farther away. Then refine distance, light, background, focus and consent. A good portrait phone supports this process with a dependable main camera, a real optical telephoto, stabilisation and carefully named imaging features, but no single feature replaces thoughtful technique.
Frequently Asked Questions
How do I take professional-looking portrait photos on a smartphone?
Choose the lens before positioning the subject, find soft directional light, keep the subject away from a distracting background, focus on the nearest eye and review exposure and edges. Use 1x for context and 3.5x for a tighter portrait from farther away.
What makes a phone good for portrait photography?
Look for a capable main camera, a genuine optical telephoto camera, OIS, reliable focus, accurate skin-tone rendering and portrait processing with clean subject edges. The photographer's control of light, distance and composition remains equally important.
Is 1x or 3.5x better for portraits?
Neither is universally better. Use 1x for groups, full-length images, confined spaces and environmental portraits. Use 3.5x for head-and-shoulders, waist-up and candid portraits where you have enough room to step back.
Does portrait mode create the same blur as an optical lens?
No. Portrait mode may create software-generated background blur by separating the subject from the scene. It can look effective, but it is not identical to optical background blur and should be checked around hair, glasses and other fine edges.